
A blank corner can be one of the hardest areas of a room to decorate. It may feel too small for furniture, too awkward for a single piece of art, or simply unfinished.
That’s where a corner gallery wall can make a surprisingly big difference.
Instead of treating the corner as dead space, you can use photographs, artwork, botanical prints and carefully chosen frames to create a focal point that feels intentional. The trick is getting the layout, spacing, frame sizes and hanging method right.
Whether you’re decorating a living room, bedroom, apartment or rental, these corner wall gallery ideas will help you choose a layout that actually works for your space—not just one that looks good in a Pinterest photo.
Quick Answer: Which Corner Gallery Wall Layout Is Best for You?
Before buying frames, identify your space and the look you want.
| Your Space or Style | Best Layout | Frame Mix | Overall Look |
|---|---|---|---|
| Small corner | Compact 5–7 frame arrangement | Small + medium | Simple |
| Large living room | Wraparound gallery | Mixed sizes | Statement |
| Narrow corner | Vertical arrangement | Mostly portrait frames | Tall & elegant |
| Rental | Lightweight frames or ledge | Consistent sizes | Minimal |
| Vintage room | Mixed-frame arrangement | Gold, wood, ornate | Collected |
| Modern room | Grid or asymmetrical layout | Matching black/oak | Clean |
| Family photos | Symmetrical arrangement | Matching frames | Classic |
| Eclectic room | Salon-style layout | Mixed sizes/finishes | Collected |
Tip: Don’t start by buying 15 frames. Plan your arrangement first and determine how much wall space you actually have.
1. Wraparound Corner Gallery Wall
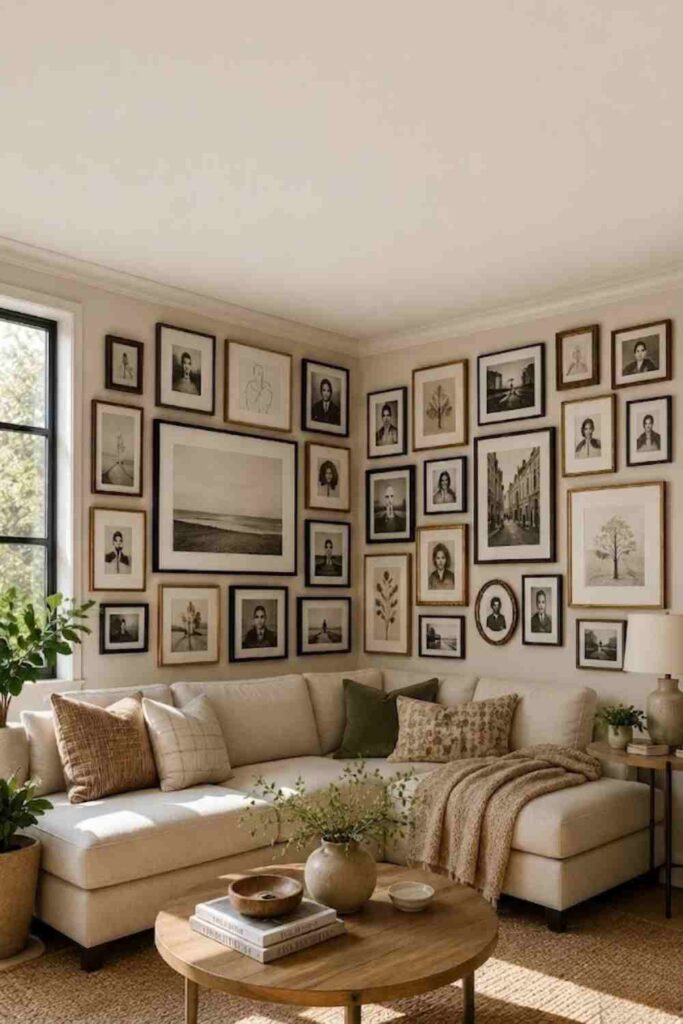
A wraparound gallery wall is one of the most effective ways to make a large or awkward corner feel intentional.
Instead of stopping your artwork at one wall, continue the arrangement around the corner onto the adjacent wall.
Best for:
- Larger living rooms
- Empty corners
- Open-plan spaces
- Rooms with high ceilings
How to make it work
Choose one strong anchor piece for the main wall and let smaller frames continue around the corner.
You don’t need the two walls to be perfectly symmetrical. In fact, a slightly asymmetrical arrangement often feels more natural.
Try: 7–12 frames in mixed sizes.
Avoid: placing an identical number of frames at exactly the same height on both walls. It can make the corner feel overly rigid.
2. Small Corner Gallery Wall
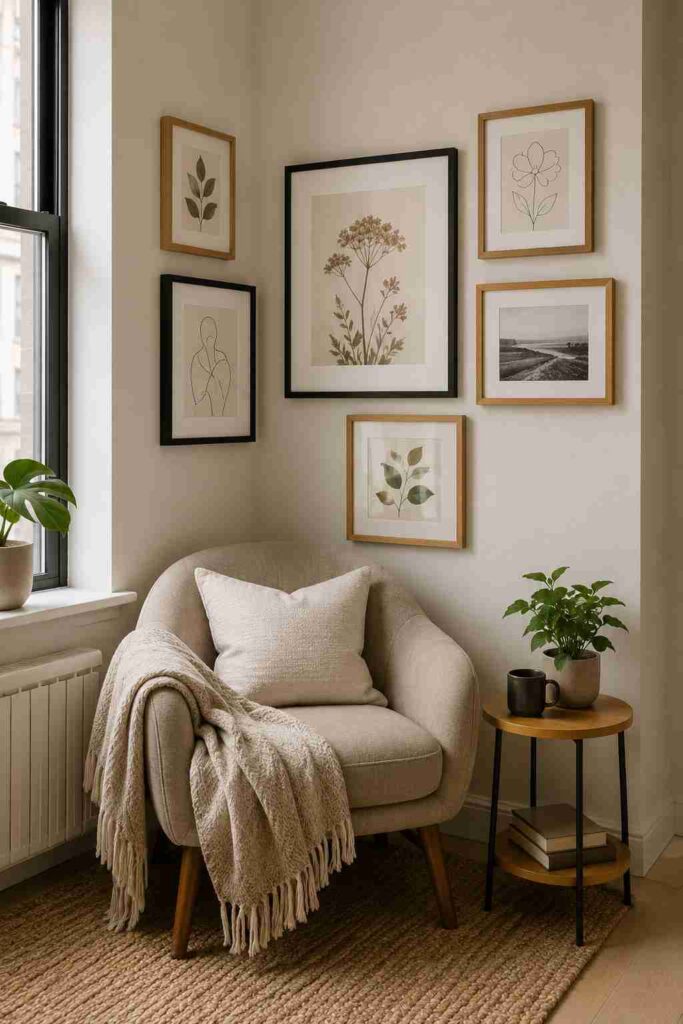
You don’t need a huge collection of artwork to create a gallery wall.
For a small apartment or narrow corner, start with five to seven frames.
A simple combination could be:
- 2 small 5×7 frames
- 2 medium 8×10 frames
- 1 larger 11×14 frame
Keep the gaps relatively tight—around 2 to 3 inches is a useful starting point for many arrangements.
The goal is to make the collection feel connected rather than scattered.
Best for:
Small apartments, bedrooms, reading corners and narrow walls.
3. Vertical Corner Gallery
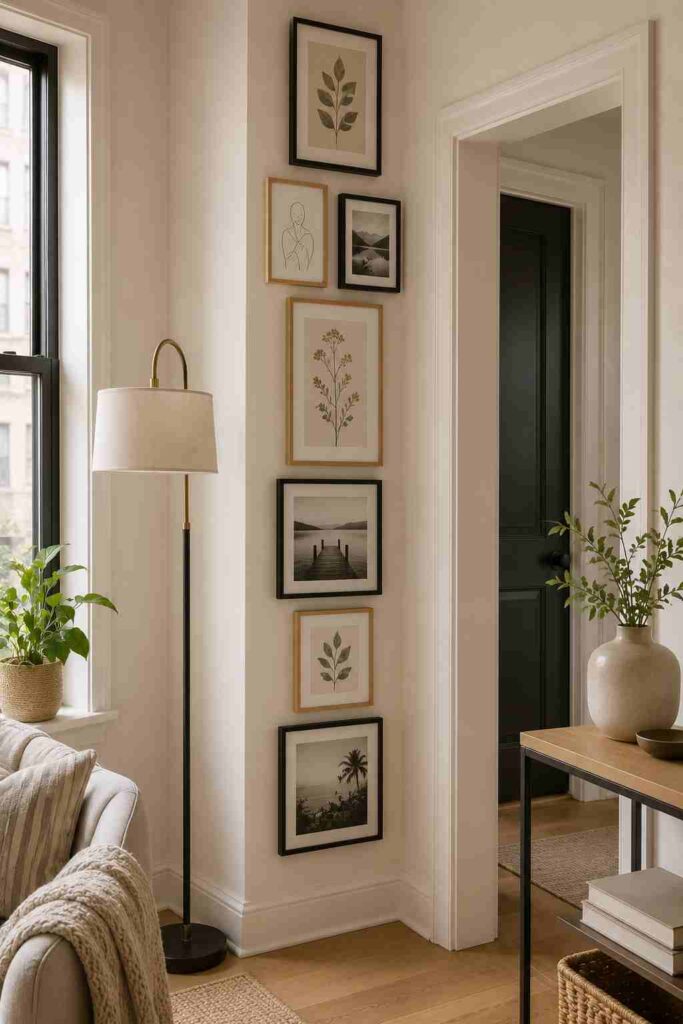
If your corner is narrow but tall, take advantage of the vertical space.
Stack portrait-oriented frames from lower to higher on the wall rather than spreading everything horizontally.
This works particularly well beside:
- A doorway
- A tall bookcase
- A floor lamp
- A narrow console
- A reading chair
A vertical arrangement can visually emphasize ceiling height without requiring much horizontal wall space.
4. Symmetrical Corner Grid
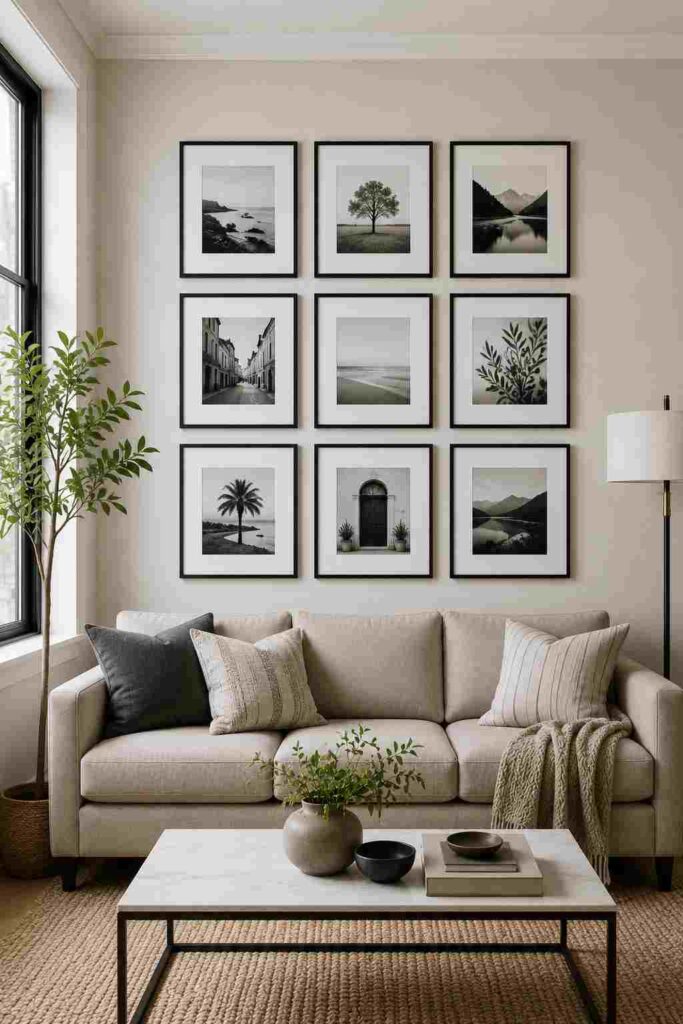
If you’re nervous about creating a gallery wall that looks messy, a grid is the safest starting point.
Use identical frames and artwork with similar dimensions.
For example:
2 columns × 3 rows = 6 frames
or
3 columns × 3 rows = 9 frames
This approach works particularly well with:
- Black-and-white photography
- Family portraits
- Minimalist artwork
- Botanical prints
The repeated structure creates visual order.
Recommended for a Simple, Symmetrical Gallery Wall
Best for: Clean, modern and coordinated gallery walls.
If you prefer a gallery wall that feels organized and balanced, matching frames are an easy way to create consistency. A five-piece set of 11×14 frames can work well for a structured arrangement where the frame style stays consistent and the artwork becomes the main visual focus.
The upsimples 11×14 Picture Frame Set of 5 — Black is worth considering if you want several matching black frames without sourcing each frame separately.
Try it for: A symmetrical corner grid, black-and-white photography, or a simple modern picture wall.
Check the latest price on Amazon →
5. Asymmetrical Corner Gallery Wall
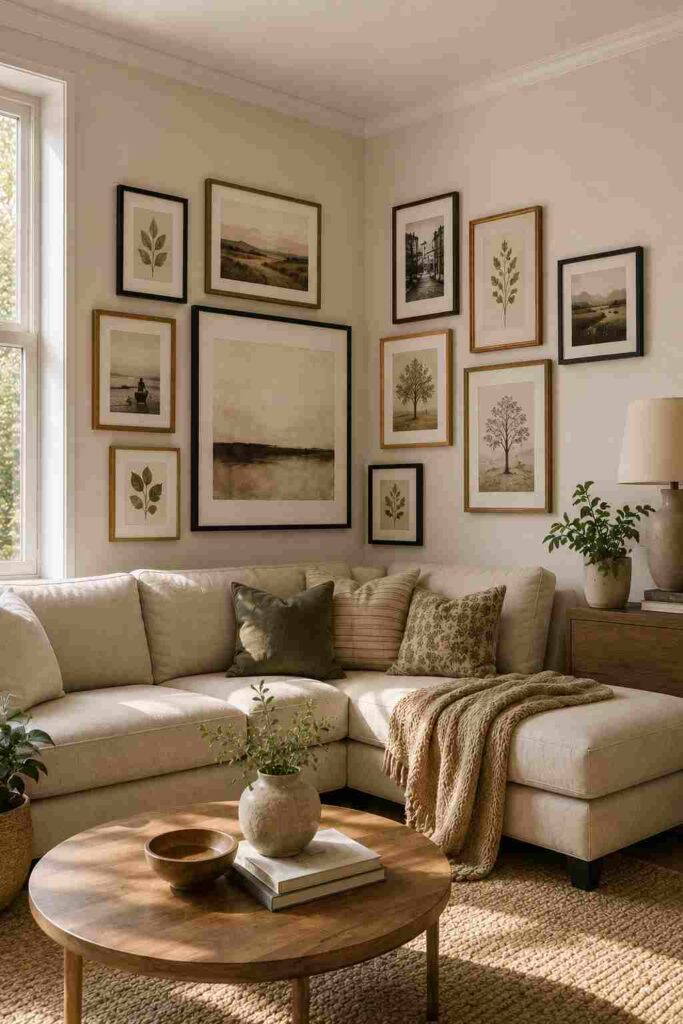
Want something more relaxed?
Try an asymmetrical arrangement.
Start with one larger frame and build outward using smaller pieces.
The important thing is that asymmetrical doesn’t mean random.
Keep some consistency through:
- Similar mat colors
- Repeated frame finishes
- A limited artwork color palette
- Consistent spacing
This is especially effective for modern, eclectic and bohemian interiors.
6. Gallery Wall Around a Room Corner
If your walls meet at a pronounced inside corner, don’t try to pretend the corner isn’t there.
Use it as part of the composition.
A useful approach is to establish the main arrangement on one wall and allow two or three smaller pieces to visually continue onto the adjacent wall.
This creates a sense of movement and makes the entire area feel connected.
7. Living Room Corner Gallery Wall
A living-room corner is one of the best places for a gallery wall because it can connect otherwise empty vertical space with your furniture.
If your gallery wall sits above or beside a sofa, don’t make it so wide that it overwhelms the furniture.
A good starting point is to visually relate the artwork to the furniture below it rather than treating the wall as an isolated area.
Try:
- Black frames with black-and-white photos
- Natural wood frames with neutral artwork
- Mixed vintage frames for a collected look
8. Bedroom Corner Gallery Wall
For bedrooms, a softer gallery wall usually works better than an overly busy arrangement.
Consider:
- Botanical prints
- Soft landscape artwork
- Personal photographs
- Neutral abstract art
- Small vintage illustrations
Keep the color palette connected to your bedding and curtains so the gallery wall feels like part of the room rather than an unrelated collection.
9. Vintage Corner Gallery Wall
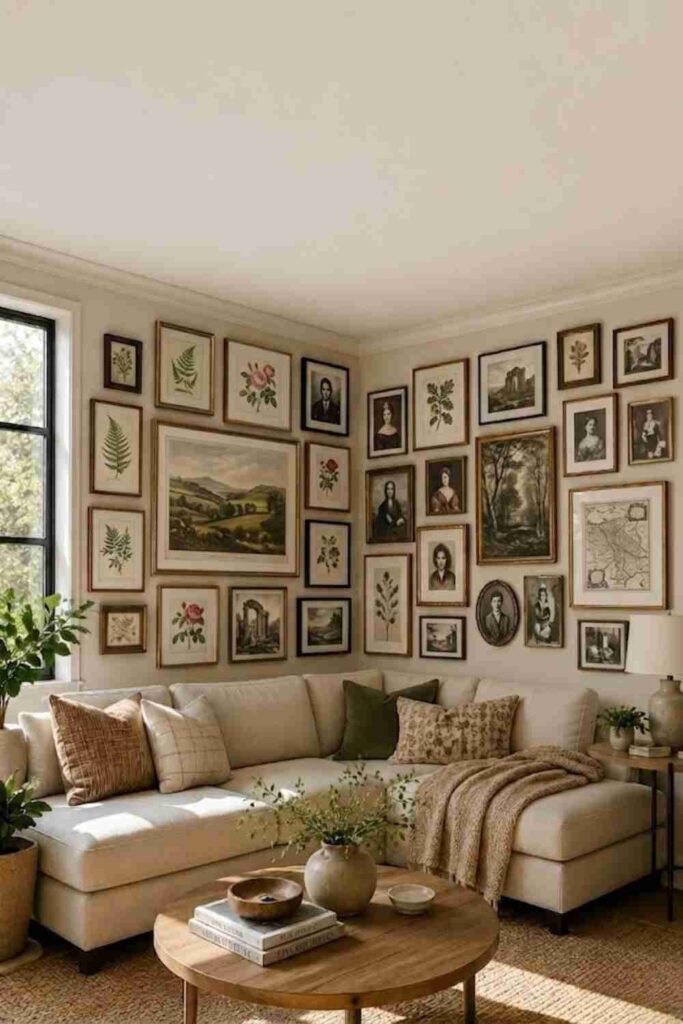
Vintage gallery walls work beautifully around corners because they naturally embrace variation.
Mix:
- Antique-style gold frames
- Dark wood frames
- Botanical prints
- Portraits
- Landscape artwork
- Small decorative pieces
You don’t need every frame to match.
Instead, create a connection through the age, color or subject matter of the artwork.
One important rule:
If your frames are highly decorative, keep the artwork relatively calm.
Otherwise, the wall can become visually overwhelming.
10. Black-and-White Photo Gallery
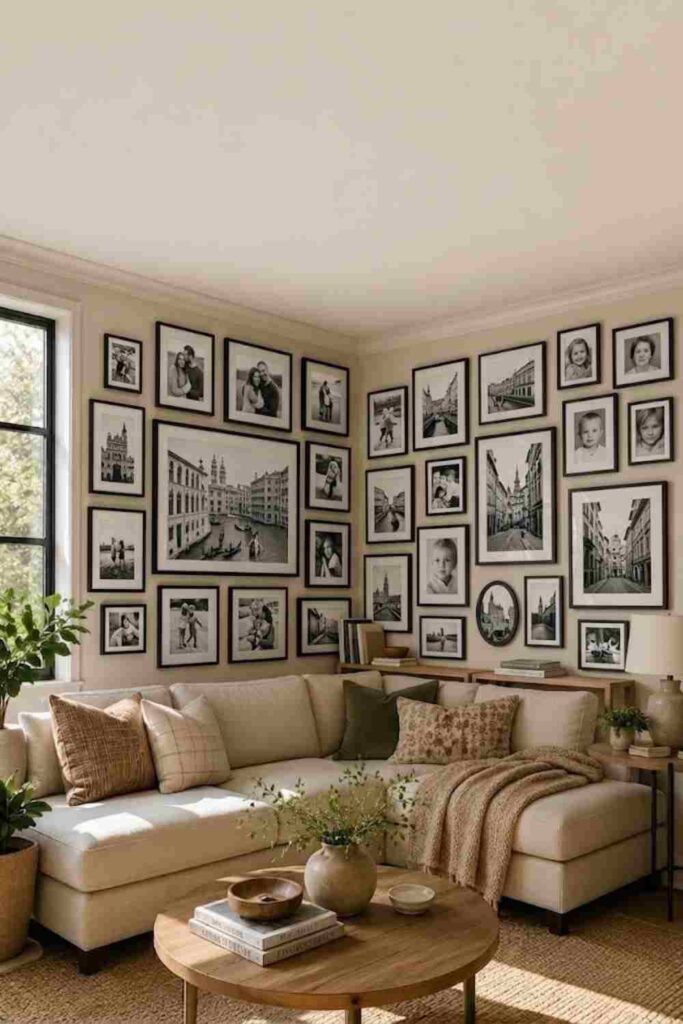
Black-and-white photography is one of the easiest ways to create a cohesive gallery wall.
Even if the photographs come from different places or periods, removing the color variation gives the collection a common visual language.
This works especially well with:
- Black frames
- White mats
- Neutral walls
- Modern furniture
For a more relaxed look, vary the frame sizes while keeping the black finish consistent.
11. Eclectic Gallery Wall
An eclectic gallery wall lets you combine photographs, artwork and decorative objects.
But there is a difference between eclectic and cluttered.
Choose at least one unifying element:
- Similar colors
- Repeated frame material
- Similar artwork style
- Consistent spacing
If everything is different, the wall can quickly lose its visual hierarchy.
12. Neutral Corner Gallery Wall
For a calm, sophisticated room, use a restrained palette.
Think:
Ivory + beige + taupe + warm wood + muted black
Choose artwork with subtle colors rather than highly saturated prints.
This works especially well with modern organic, Scandinavian and warm minimalist interiors.
Recommended for a Warm, Neutral Gallery Wall
Best for: Warm minimalist interiors and neutral artwork.
If you want your gallery wall to feel softer and less formal, natural-finish frames can work beautifully with cream walls, beige furniture, light wood, botanical artwork and neutral photography.
The upsimples 11×14 Natural Frame Set of 5 is worth considering if you want several matching frames while keeping the overall display warm and understated.
Try it for: Neutral landscapes, botanical prints, black-and-white photography, or a calm living-room gallery wall.
Check the latest price on Amazon →
13. Botanical Corner Gallery Wall
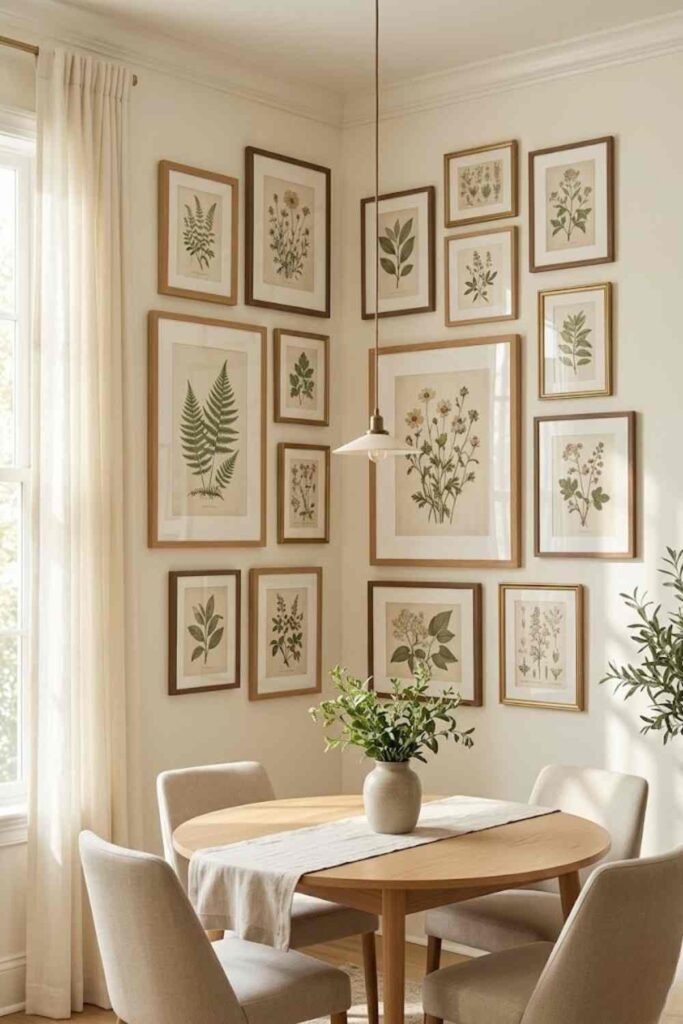
Botanical prints are particularly useful when you want a gallery wall to feel decorative without relying entirely on family photographs.
Mix different plant illustrations while keeping the background and frame style consistent.
For a vintage-inspired look, try:
- Fern illustrations
- Herb prints
- Botanical drawings
- Pressed-flower artwork
- Antique garden illustrations
14. Family Photo Corner
A corner gallery wall can turn family photographs into a meaningful feature rather than scattering them around the house.
For a cohesive result, use the same frame finish throughout.
Black, white and natural wood are easy choices.
Simple formula:
Use one larger family photograph as the anchor, then surround it with smaller images.
Try to keep the visual density balanced rather than filling every available inch.
Recommended for Family Photo Gallery Walls
Best for: Family photos and mixed-size picture walls.
A picture gallery wall often looks more natural when photographs aren’t all exactly the same size. Mixing a few larger portraits with smaller family snapshots creates more visual movement and makes the arrangement feel collected rather than overly uniform.
The SONGMICS 10-piece picture frame set combines 8×10, 5×7 and 4×6 frames, giving you several sizes to work with when arranging family photographs.
Try it for:
Family memories, travel photographs, wedding photos, children’s pictures, or a personal living-room photo wall.
Check the latest price on Amazon →
15. Reading Nook Gallery Wall
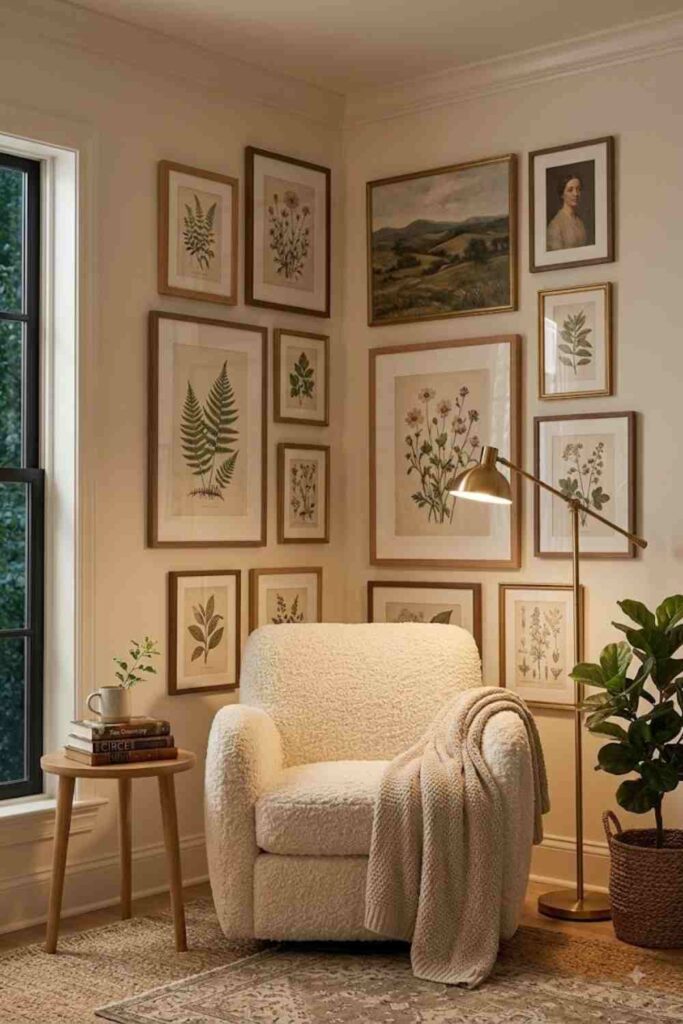
If you have a reading chair tucked into a corner, a small gallery wall can make the space feel much more intentional.
Pair framed artwork with:
- A small plant
- A floor lamp
- A side table
- A few books
This is also a great opportunity to use a picture ledge instead of permanently hanging every frame.
Want to turn your gallery-wall corner into a cozy reading space? See these luxury reading nook ideas on a budget for ways to combine comfortable seating, lighting, rugs, and affordable decor without making the space feel cluttered.
16. Renter-Friendly Corner Gallery Wall
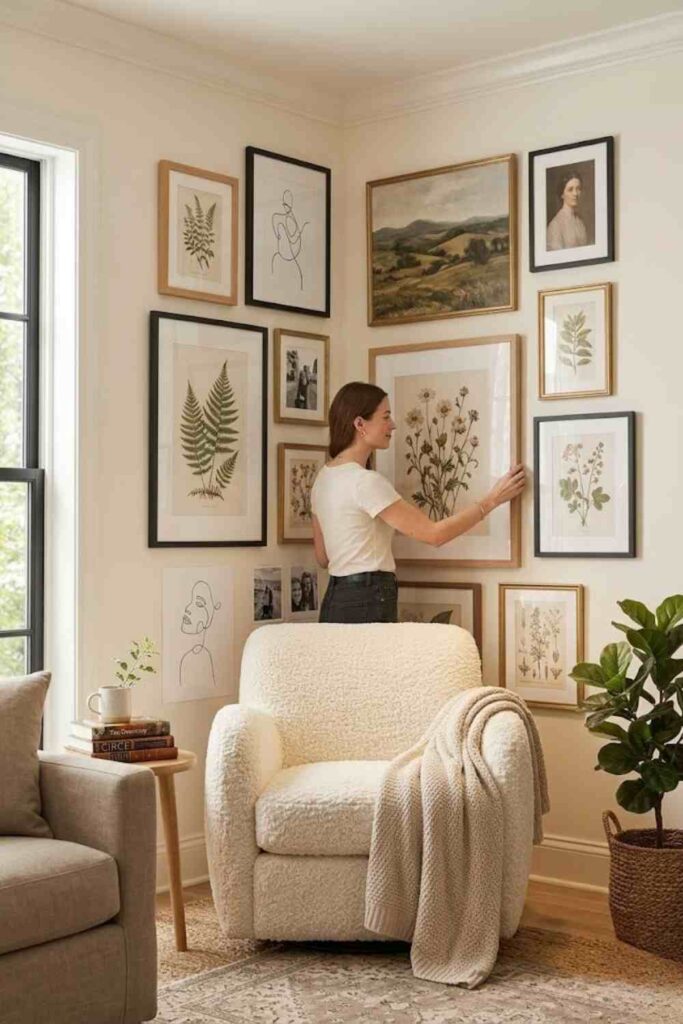
Renting doesn’t mean you have to live with blank walls.
For lightweight artwork, removable hanging solutions can be useful when the frame weight, wall surface and product instructions are compatible.
Another option is to use:
- Picture ledges
- Leaning frames
- Lightweight frame sets
- Furniture-supported artwork
Important:
Don’t assume every adhesive strip works on every wall.
Check the manufacturer’s instructions, including:
- Maximum weight
- Surface requirements
- Preparation instructions
- Removal instructions
For example, Command’s official instructions specify weight and surface limitations and advise against certain applications, including wallpaper and areas above beds.
17. Gallery Wall With a Picture Ledge
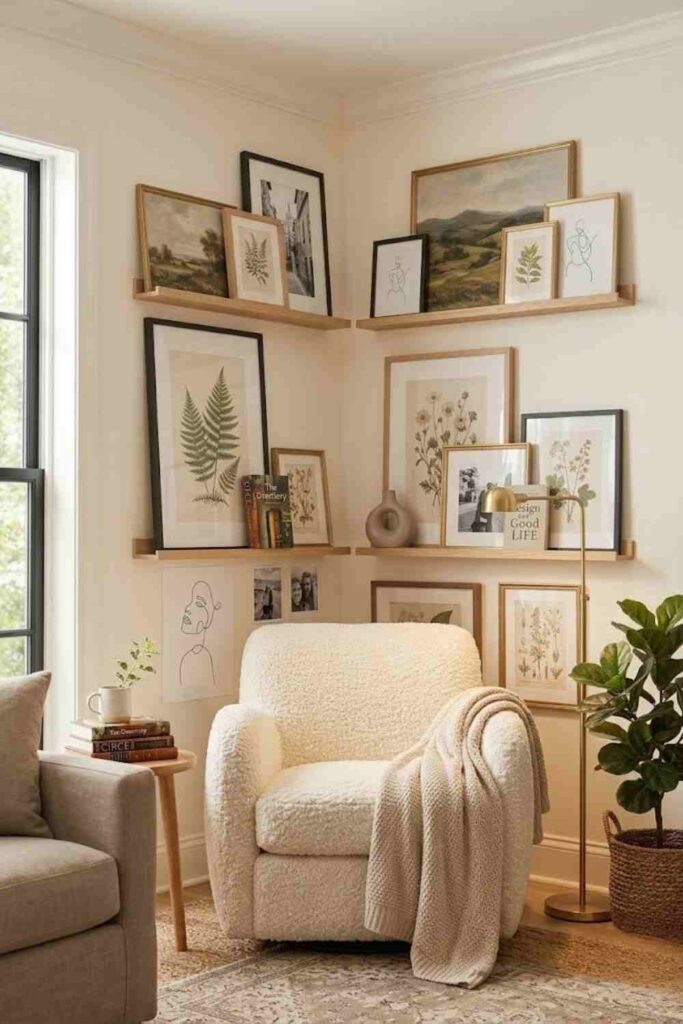
If you love changing your artwork, a picture ledge may be more practical than permanently hanging every frame.
Layer different frame sizes against the wall and rearrange them whenever you want.
Why it’s useful
You can:
- Change seasonal artwork
- Add new photographs
- Rearrange frames
- Layer books and small decor
- Avoid creating a new hole for every artwork change
This is particularly useful for renters and people who frequently change their decor.
Recommended Picture Ledge
Best for: Flexible displays and renters who like to change their artwork.
A picture ledge offers a flexible alternative to arranging every frame permanently on the wall. You can layer framed photographs, artwork and smaller decorative pieces, then easily change the arrangement when you want a different look.
A simple floating picture ledge can work particularly well in small apartments, reading corners and narrow wall spaces where a traditional gallery wall may feel too permanent or visually busy.
Try it for: Layered family photographs, small prints, seasonal artwork and rotating decor.
Check the latest price on Amazon →
How to Arrange a Gallery Wall Around a Corner
Now that you’ve seen the different styles, here’s the part that matters most: how to actually create one without ending up with crooked or awkwardly spaced frames.
Step 1: Measure Both Walls
Measure the usable wall area on both sides of the corner.
Don’t measure only the first wall and assume the second side will work automatically.
Also consider:
- Furniture below
- Doorways
- Windows
- Light switches
- Outlets
- Baseboards
Step 2: Choose Your Anchor Piece
Start with your largest or most important frame.
This becomes the visual anchor.
If you’re using family photographs, it could be your favorite family portrait.
For artwork, choose the piece with the strongest visual presence.
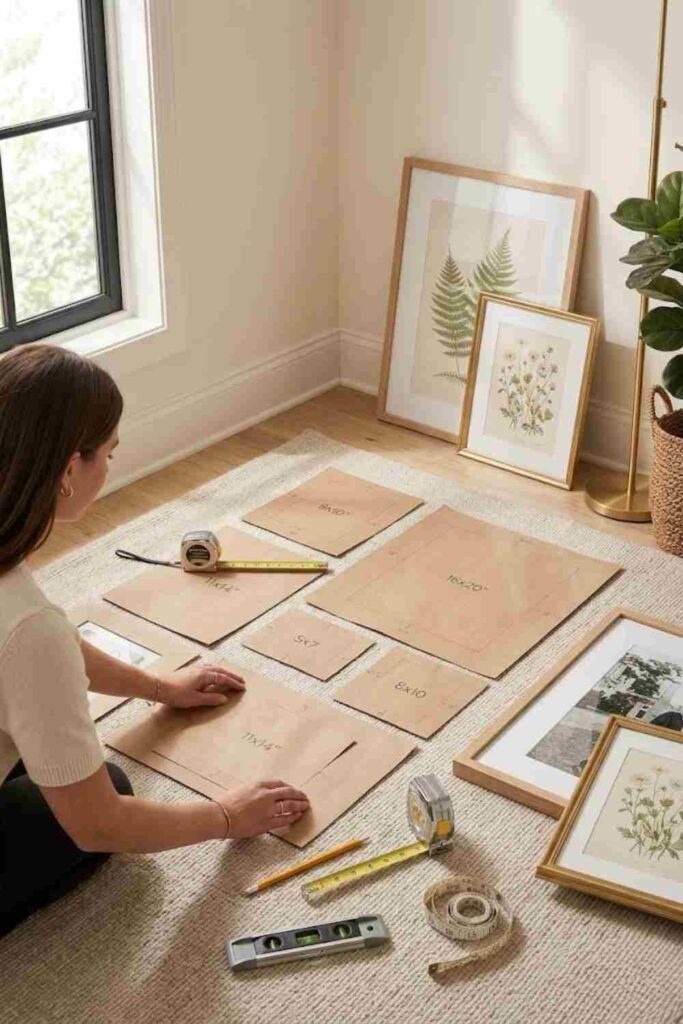
Step 3: Create the Arrangement on the Floor
This is one of the easiest ways to avoid unnecessary holes.
Place your frames on the floor in approximately the same proportions as the wall.
Move them around until the composition feels balanced.
Take a photo before changing anything.
Step 4: Keep Your Spacing Consistent
A useful starting point is around 2–3 inches between frames.
You can tighten the spacing for a dense salon-style gallery or increase it for a minimalist arrangement.
The important thing is consistency.
Step 5: Use Paper Templates
For a complicated arrangement, trace each frame onto paper.
Cut out the shapes and temporarily attach them to the wall.
This lets you see the composition before committing to the final installation.
It’s especially useful for a corner because you can adjust the relationship between the two walls.
Step 6: Check the Overall Center
Don’t obsess over making every individual frame perfectly centered.
Instead, look at the center of the entire collection.
A gallery wall usually feels more balanced when the overall composition relates naturally to eye level and the furniture underneath.
Step 7: Install the Frames
Choose your hanging method based on:
- Frame weight
- Wall type
- Rental restrictions
- Product instructions
Lightweight artwork may be suitable for an appropriate removable hanging solution.
Heavier artwork generally requires hardware designed for the load and wall type.
How Much Space Should You Leave Between Gallery Wall Frames?
For many gallery walls, 2–3 inches is a useful starting point.
But don’t treat this as an unbreakable rule.
Use tighter spacing when:
- You want a collected vintage look
- You have many small frames
- You’re creating a salon-style wall
Use wider spacing when:
- You have fewer large frames
- Your room is minimalist
- You want each artwork to breathe
The most important thing is that the spacing looks intentional.
How Many Frames Do You Need?
There’s no magic number.
Instead, choose the number based on your available wall space.
3–5 frames
Best for:
- Small corners
- Bedrooms
- Minimalist interiors
- Small apartments
6–9 frames
Best for:
- Medium living-room corners
- Family photo arrangements
- Mixed artwork
10–15+ frames
Best for:
- Large walls
- Eclectic interiors
- Statement gallery walls
More frames don’t automatically mean a better gallery wall.
A carefully planned seven-frame arrangement can look far more sophisticated than 15 randomly placed pictures.
When Does a Gallery Wall Start Looking Cluttered?
Watch for these signs:
Too many frame finishes
If you have black, gold, silver, white, wood and colorful frames all together, there may be no visual connection.
No anchor piece
Every artwork has equal visual importance, making the wall feel chaotic.
Inconsistent spacing
Even beautiful frames can look messy when the gaps constantly change.
Too many colors
If every piece introduces a different color, the wall can compete with the rest of the room.
Frames are too close to furniture
Leave enough breathing room between the artwork and the furniture beneath it.
No relationship between the artwork
A collection doesn’t have to match, but it should have something connecting it.
How to Choose the Right Gallery Wall Frames
Your frame choice should support the style of your room.
| Interior Style | Frame Finish | Artwork That Works Well |
|---|---|---|
| Modern | Black or thin metal | Photography |
| Warm minimal | Natural oak | Neutral artwork |
| Vintage | Antique gold or wood | Botanical prints |
| Eclectic | Mixed finishes | Art + photographs |
| Traditional | Dark wood | Family photography |
| Soft feminine | Light wood or muted gold | Botanical/art prints |
A simple designer rule
Don’t change everything at once.
If you want different frame sizes, keep the finish consistent.
If you want mixed frame finishes, keep something else consistent—such as the mat color or artwork palette.
That gives the wall variety without making it chaotic.
If you prefer a softer, nature-inspired color palette, sage green pairs especially well with warm oak, cream, beige, and muted gold. This combination works beautifully when you want your gallery wall to feel calm and collected rather than overly coordinated. For more inspiration on using this color combination throughout a bedroom, see these sage green bedroom ideas with Amazon finds.
Best Products for Creating a Corner Gallery Wall
The best product depends on the problem you’re trying to solve.
1. Gallery Wall Frame Sets
Best for: Beginners who want a coordinated look.
A multi-frame set can save time because you don’t have to individually source every frame.
Look for sets with:
- Multiple sizes
- Consistent finish
- Real glass or suitable acrylic
- Wall hardware included
- Mats when appropriate
Best use:
A first gallery wall where you want the frames to coordinate automatically.
Recommended Gallery Wall Frame Set
Best for: Mixed-size gallery walls
If you want a coordinated gallery wall without buying every frame separately, a mixed-size set can make the planning process much easier. This SESEAT set includes 10 frames in 11×14, 8×10, 5×7 and 4×6 sizes, giving you several proportions to work with when creating a more collected arrangement. The set uses a combination of finishes, so it can work particularly well for an eclectic or layered gallery-wall style.
Why I like it for a beginner: You get different frame sizes in one purchase, so you can experiment with a larger anchor frame surrounded by smaller photographs instead of trying to source every size individually.
One thing to know: The set uses acrylic/plexiglass rather than traditional glass, so it is lighter but can be more prone to scratching and glare.
Check the latest price on Amazon →
2. Individual Picture Frames
Best for: Custom gallery walls.
Choose individual frames if your corner has an unusual shape or you already own artwork in different dimensions.
This gives you more control over the final composition.
3. Picture Hanging Strips
Best for: Appropriate lightweight frames in compatible locations.
These are particularly relevant for renter-friendly gallery walls.
But don’t choose them simply because a listing says “damage-free.”
Check:
- Frame weight
- Surface type
- Product instructions
- Preparation requirements
- Whether the location is appropriate
The manufacturer’s instructions should always take priority.
How to Hang a Gallery Wall Without Nails
A Renter-Friendly Hanging Option
If you’re renting or simply don’t want to drill multiple holes into the wall, picture-hanging strips can be an alternative for suitable frames and wall surfaces. Before using them, check the manufacturer’s weight limits, surface requirements and application instructions.
Command Large Picture and Frame Hanging Strips are one option to consider when you want to hang suitable frames without traditional nails or screws.
Important: Don’t assume every frame or wall surface is suitable. Follow the manufacturer’s instructions and weight limits carefully.
Check the latest price on Amazon →
4. Picture Hanging Kits
Best for: Artwork that requires traditional mechanical support.
A hanging kit can be useful when you need different hardware options for different frame weights.
This is a better choice than trying to force one adhesive solution onto every frame.
5. Picture Ledges
Best for: People who like to change their artwork.
A picture ledge lets you lean and layer frames instead of permanently hanging each piece.
It’s especially useful for:
- Renters
- Seasonal decor
- People who frequently redecorate
- Family photo collections
6. Corner Floating Shelves
Best for: Combining artwork with decorative objects.
Instead of covering the entire corner with frames, use a shelf to introduce:
- Books
- Small plants
- Candles
- Small framed photographs
- Decorative objects
This creates more dimension than a flat gallery wall.
7. Picture Lights
Best for: Making your gallery wall a focal point at night.
A small picture light above the artwork can change how the wall looks after sunset.
It’s particularly effective with:
- Vintage artwork
- Dark frames
- Large statement pieces
- Dining rooms
- Reading corners
Gallery Wall Ideas for Different Room Sizes
Small Apartment
Choose 5–7 frames and keep the artwork relatively compact.
A picture ledge can be even better if you frequently rearrange your decor.
Average Living Room
Try 6–9 frames with one larger anchor piece.
Relate the arrangement to the sofa, console or other furniture below it.
Large Wall or Corner
You can increase the number of frames and create a wraparound composition.
Don’t simply fill every inch.
Large negative spaces can actually make a statement gallery wall look more expensive.
7 Gallery Wall Mistakes to Avoid
1. Buying frames before measuring
Fix: Measure your wall first.
2. Hanging everything too high
Fix: Consider the center of the overall arrangement and its relationship to nearby furniture.
3. Using random spacing
Fix: Start with a consistent 2–3-inch gap.
4. Choosing frames that are too small
Fix: Use fewer, larger frames if the wall is substantial.
5. Mixing too many styles
Fix: Keep one visual element consistent.
6. Skipping the floor-layout test
Fix: Arrange everything on the floor first.
7. Using the wrong hanging hardware
Fix: Match the hanging method to the frame weight and wall surface.
5 Corner Gallery Wall Layouts You Can Copy
Layout 1 — Small Corner
2 small + 2 medium + 1 large
Best for bedrooms and apartments.
Layout 2 — Vertical
4–6 portrait frames stacked upward
Best for narrow corners.
Layout 3 — Wraparound
1–2 large anchor frames + 6–10 smaller frames
Best for large living rooms.
Layout 4 — Clean Grid
2 × 3 or 3 × 3 matching frames
Best for modern interiors.
Layout 5 — Eclectic
1 large + 2 medium + several small frames
Best for vintage and collected interiors.
Also Read: Vintage Gallery Wall Ideas: 21 Timeless Looks for Every Room
Frequently Asked Questions
How do you make a gallery wall around a corner?
Start by measuring both walls, choose an anchor piece, arrange your frames on the floor, and maintain consistent spacing as the arrangement continues around the corner.
How far apart should pictures be on a gallery wall?
Around 2–3 inches is a useful starting point for many arrangements. Adjust slightly depending on the frame sizes and style you’re creating.
How many pictures should be in a gallery wall?
There isn’t a fixed number. Small walls may need 3–5 frames, medium arrangements often work with 6–9, while large statement walls can use 10 or more.
What size frames look best on a gallery wall?
A combination of sizes usually creates more visual interest. For a simple arrangement, combine small 5×7 or 8×10 frames with one or two larger anchor pieces.
Can you make a gallery wall in a rental?
Yes. Depending on the wall surface and artwork weight, renters can consider lightweight frames, appropriate removable hanging products, picture ledges or leaning artwork. Always follow the manufacturer’s installation requirements.
How do you hang a gallery wall without nails?
For appropriately lightweight frames, removable hanging products may be an option if the wall surface, weight and location meet the manufacturer’s requirements. Picture ledges are another way to reduce the number of individual wall attachments.
Should gallery wall frames match?
They don’t have to. Matching frames create a cleaner look, while mixed frames can create a more collected or vintage appearance. If mixing frames, keep another element consistent, such as artwork colors or mat style.
Should a gallery wall be centered on the wall or furniture?
Usually, relate the gallery wall to the furniture beneath it rather than the empty wall alone. The overall composition should feel balanced with the sofa, console, bed or other nearby furniture.
How do you keep gallery wall frames straight?
Plan the arrangement first, use paper templates for complicated layouts, measure carefully and check each frame with a level during installation.
Final Thoughts
A corner doesn’t have to be the awkward leftover space in your room.
With the right frame sizes, spacing and layout, it can become one of the most interesting parts of the space.
If you’re unsure where to start, keep it simple: choose 5–7 frames, select one larger anchor piece, keep your spacing consistent and test the entire arrangement on the floor before putting anything on the wall.
For renters, a picture ledge or an appropriate removable hanging solution can make the project easier—but always check the product’s weight and surface requirements before installing.
And if you want a more collected look, don’t be afraid to mix frame sizes. The secret isn’t making everything identical. It’s giving the collection one or two visual rules that hold everything together.